Spring wreath making

I haven’t got myself together enough to do my April Styling the Seasons post yet but I was going through pics the other day and came across the film photographs Katharine Peachey took for us at exactly this time last year of the Style At Mine event that Charlotte and I held with at{mine}.

It was such a gorgeous morning of chatting and Spring wreath-making with Caroline from Wild Rubus using flowers from Bloom and Wild and I hope you don’t mind if I share some more photos of it as there is too much pretty to keep to myself.

copyright Katharine Peachey (3 of 78)

Photograph by katharinepeachey.co.uk | Spring wreath making | Apartment Apothecary

Photograph by katharinepeachey.co.uk | Spring wreath making | Apartment Apothecary

Photograph by katharinepeachey.co.uk | Spring wreath making | Apartment Apothecary

Photograph by katharinepeachey.co.uk | Spring wreath making | Apartment Apothecary

Photograph by katharinepeachey.co.uk | Spring wreath making | Apartment Apothecary

Photograph by katharinepeachey.co.uk | Spring wreath making | Apartment Apothecary

Photograph by katharinepeachey.co.uk | Spring wreath making | Apartment Apothecary

Photograph by katharinepeachey.co.uk | Spring wreath making | Apartment Apothecary

Photograph by katharinepeachey.co.uk | Spring wreath making | Apartment Apothecary

If you are inspired to make your own Spring wreath that will brighten up your front door or a wall in your home you can buy rattan wreaths here and floral wire here and here. I might put one together this weekend.

Katy x


*All images by Katharine Peachey.

Liberty print pyjama trousers

I love the feeling of the coming of Spring and it is the best time to plan new projects. I have a few sewing projects that I would like to get going on once my flat is back to normal (is it just me or is anybody else unable to start something new when the house is in disarray?). In the meantime I thought it would be nice to share the perfect Spring pyjama trousers tutorial that I made for a magazine last year. The template for the PJ’s can be found in The Liberty Book of Simple Sewing (p.118) and I hope my photos of each step will help sewing the pattern together easier. Aren’t these prints so pretty and Spring-like?

You will need

Two trouser leg pieces (one in reverse) – I used Betsy S Tana Lawn

Two cuff pieces in a contrasting fabric – I used Phoebe H Tana Lawn

One waistband piece in contrasting fabric

2cm width elastic for waistband (length will depend on size of child) and large safety pin

Fabric scissors, pins, hand sewing needle and matching thread.

N.B. All seam allowances are 1cm / You can tack the pieces of fabric together at every stage before you machine stitch / I followed the pattern in the Liberty book of sewing for a 7-8 yr old.

Liberty print pyjamas tutorial |Liberty Book of Sewing | Apartment Apothecary

Step by step

Step 1 – To make the leg, press a 1cm hem on the bottom edge of the cuff piece. Pin the top edge of the cuff to the bottom edge of the leg piece, right sides facing.

Liberty print pyjamas tutorial |Liberty Book of Sewing | Apartment Apothecary

Step 2 – Stitch the cuff to the leg piece and press the the seam allowance over the cuff.

Liberty print pyjamas tutorial |Liberty Book of Sewing | Apartment Apothecary

Step 3 – Fold the leg in half lengthways, right sides facing, and pin together up to the crotch.

 Step 4 – Stitch the leg piece together.

Step 5 – Press open the cuff seam.

Liberty print pyjamas tutorial |Liberty Book of Sewing | Apartment Apothecary

Step 6 – Overlock or zig zag stitch the seam allowance of the leg piece.

Liberty print pyjamas tutorial |Liberty Book of Sewing | Apartment Apothecary

Step 7 – Turn the cuff up in half so that the hemmed edge meets the seam line. Pin and then stitch about 3mm from the top of the cuff.

Liberty print pyjamas tutorial |Liberty Book of Sewing | Apartment Apothecary

Complete steps 1 – 8 for the second leg.

 Step 8 – To sew the legs together, pin the two trouser legs together where the two inside leg seams meet, with the right sides facing. Pin the front and back seams together and then stitch. Overlock or zig zag stitch the seam allowances.

Liberty print pyjamas tutorial |Liberty Book of Sewing | Apartment Apothecary

Step 9 – Turn the trousers right sides out and to add the waistband, press a 1cm hem on each end and over the top edge of the waistband (checking that it fits around the waist of the trousers – adjust the hem at either end accordingly).

Liberty print pyjamas tutorial |Liberty Book of Sewing | Apartment Apothecary

Step 10 – With right sides facing, match up the raw edges of the waistband and the waist of the trousers. Pin the waistband in place and stitch together.

Liberty print pyjamas tutorial |Liberty Book of Sewing | Apartment Apothecary

Step 11 – Turn the waistband inside the waist so that it covers the raw edges of the seam allowance. Pin in place and stitch around the waistband as close to the seam as possible.

Liberty print pyjamas tutorial |Liberty Book of Sewing | Apartment Apothecary

Step 12 – Measure the waist size of your child and mark this on the elastic. Attach a large safety pin to one end of the elastic and thread this through the waistband until it comes out the other side. Find the mark you made and sew the two ends of the elastic together at this mark very securely. Push the elastic back into the waistband and slip stitch the opening closed. You can add a bow if you desire.

Liberty print pyjamas tutorial |Liberty Book of Sewing | Apartment Apothecary

All done! This little pair of PJ’s went to the lovely Ella x

Liberty print pyjamas tutorial |Liberty Book of Sewing | Apartment Apothecary

What’s next on your sewing list?

Katy x


Apartment Therapy home tour

At the very end of last year, just before the Christmas decorations came out, photographer Cathy Pyle came over to shoot my flat one last time before I complete our living room and kitchen makeovers. It was a very dark and gloomy day so Cathy did a great job of capturing the little light that there was and even though the flat is in a state of flux as I have recently cleared out loads of stuff from the living room so it looks a little bare, she managed to pick out some lovely details and I’m so pleased that the photographs feature on Apartment Therapy today.

Here are a few of my favourite shots from the home tour…

Home of Katy Orme on Apartment Therapy | Apartment Apothecary| Photograph by Cathy Pyle

Quilt from The White Company, Cushion from Maud Interiors, Bed from Loaf, Bedside light from Houseology, Curtains from John Lewis, Clip-on light from Original BTC, Sheepskin from Modern Rugs, Stool from Loaf, Floor painted in Farrow & Ball All White floor paint.

Home of Katy Orme on Apartment Therapy | Apartment Apothecary| Photograph by Cathy Pyle

Basket from Oggetto Home, House of Rym throw from The Future Kept, Glass frame from Decorator’s Notebook.

Home of Katy Orme on Apartment Therapy | Apartment Apothecary| Photograph by Cathy Pyle

Peg rail from Ikea, Lights from Cable and Cotton.

Home of Katy Orme on Apartment Therapy | Apartment Apothecary| Photograph by Cathy Pyle

Tray designed by HAY

Home of Katy Orme on Apartment Therapy | Apartment Apothecary| Photograph by Cathy Pyle

Vintage Japanese enamel tea pot.

Home of Katy Orme on Apartment Therapy | Apartment Apothecary| Photograph by Cathy Pyle

My top from Boden

All images by Cathy Pyle.

Do pop over to Apartment Therapy to see the whole home tour.

Katy x

Unloading

797

I have cried every day for two years. Sometimes it’s just a tear or two in the shower or at my desk, so quiet and fleeting that I barely register it anymore. Other times it is hysterical or heaving sobs that can last for hours: the kind that take over your whole body and leave you physically exhausted. I didn’t know it was possible to cry this much or to feel this sad. The thing is, I need somewhere to put some of this grief and I hope you don’t mind if I put it here because if I keep it inside any longer I think I might break.

In the last eighteen months I have endured four heartbreaking rounds of IVF. It’s been a whirlwind of treatment – we did the first three rounds in the space of just nine months. Self preservation has left me with very little memory of the treatment itself, save the trauma of emergency surgery due to side effects of the second round: a physical pain that I will never forget as long as I live. But it’s the emotional pain that has cut me so deep that I don’t think I will ever heal.

Friends of mine may read this and not even know I’ve been having treatment because when we started the first round I couldn’t even imagine that eighteen months later we would still be fighting this lonely battle and the last thing I wanted to do was to put pressure on myself, having to deal with everyone’s questions and expectations. However, to continue to keep it a secret is to make the isolation of fertility treatment even worse. The only way I can describe IVF is that it feels like taking the most important exam of your life and having to open that dreaded envelope that holds the results over and over again. On day 9 of treatment you find out how many follicles there are (last time I had around 20), day 12 the number of eggs (18) and the number of healthy sperm and then you wait, physically shaking, for the call the next morning to find out how many eggs have fertilised overnight (5). Finally on day 17 of treatment you find out how many embryos have continued to develop normally (3) and the chosen embryo then has a 45% chance of implanting in to the womb. A horrible numbers game that I don’t want to play anymore.

There is nothing that comforts me or anything that can be said to help me feel more positive. I had the briefest moment of hope in our last round, which has been the most successful as we managed to make three blastocysts (five day old well developed embryos that have a higher chance of implanting once they are transferred back into the womb – they transferred one and froze the other two). I dared to hope, such a very dangerous thing to do, that the embryo that they transferred back could be our baby. After the embryo transfer there is a two week wait until the pregnancy test but I started bleeding after only four days: I didn’t even have two week’s worth of hope. I don’t think I will let myself hope again.

We do have two frozen embryos that we will use for our fifth and sixth round of IVF, a much easier process than doing full ‘fresh’ rounds, at least. I don’t think it will work, I don’t see myself with children in my future anymore, but better to try than leave those little embryos alone in that freezer.

This may all sound over dramatic to some or even alienate others, but before that day when the doctor told us that we would never conceive naturally and my head spun in disbelief and I thought I was going to vomit, I had no idea how profoundly infertility can affect ones life. I have often felt guilty talking or crying about it to friends as though it is the end of the world as I am fully aware that there are tougher obstacles being faced by people the world over. However, the pain that I am feeling is very real to me and selfishly I feel the need to share some of it as my own inner monologue is beginning to drive me mad. My life has stopped moving forward since IVF and I think it has changed me as a person: I feel defined and crushed from the inside out by the desperate need for a baby and I wear a big fake smile to cover up the pain and to make getting through each pointless day easier. Forgive me this self-pitying out pouring; today, the tears won’t stop and this was the only thing I could think to do to try to make myself feel better.

Katy x


Casa e Jardim interview

I was very excited last week when an interview I did was published in Brazilian Homes and Garden magazine, Case e Jardim. I had to take up to date photographs of my home for the article (although, I really need to improve my photography skills!) and I wanted to share some of those with you today, as well as some of the questions and answers that feature in the magazine. If you can read Portuguese you can see the whole interview here.

How can you turn a house into “home sweet home”?

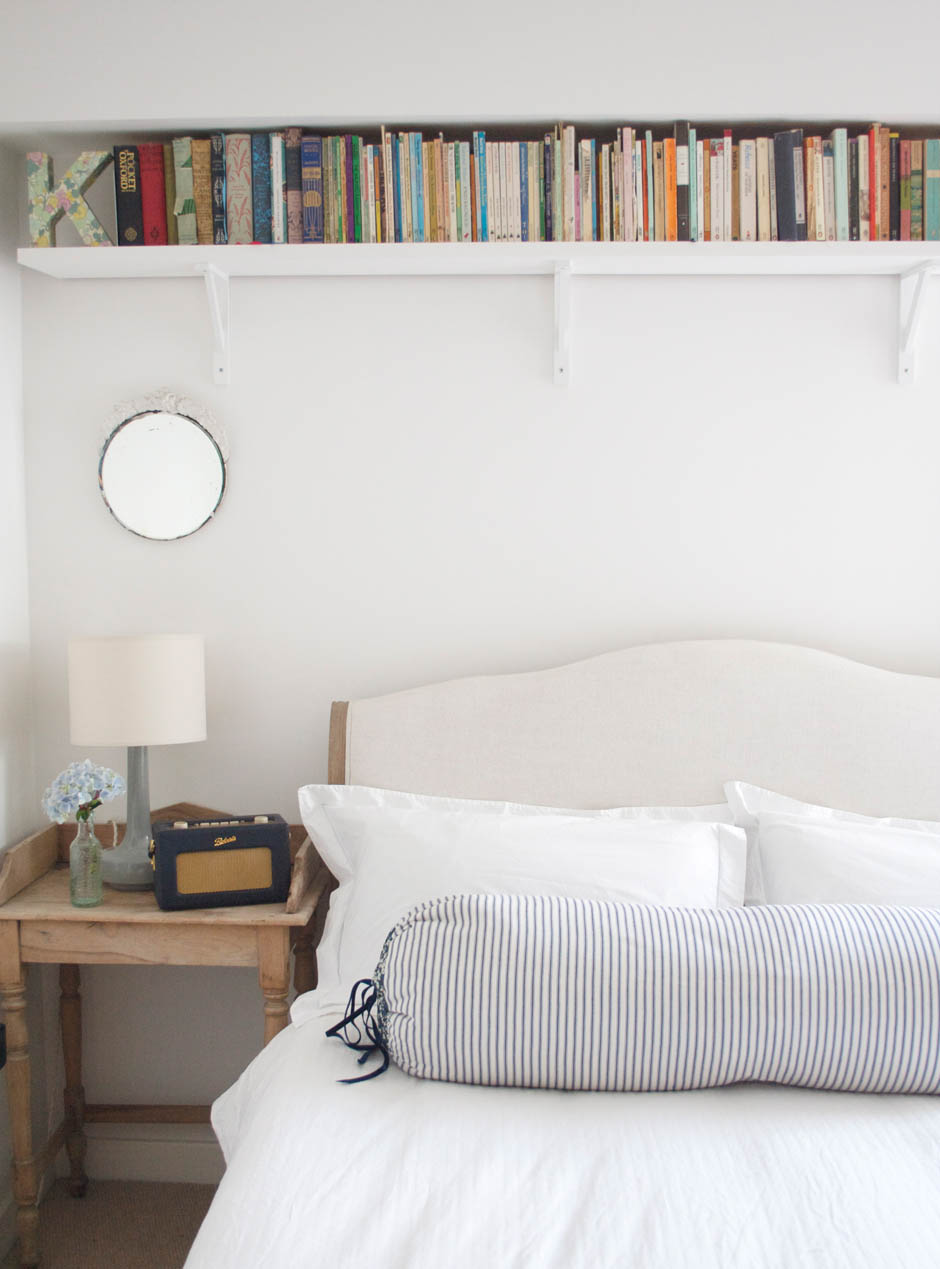
To make a house a home it is all about the personal touches you add whether they be photographs, postcards, one off pieces of furniture, ornaments or collections from your travels. When each item has a story and a memory it makes your home feel so much more interesting and alive. I hate generic furniture as it leaves a home feeling cold and impersonal.

Katy Orme's home | Apartment Apothecary

Katy Orme's home | Apartment Apothecary

What time of day do you feel most inspired?

I’m definitely a morning person as I have the most energy then and I love the morning light. When I know that I have the whole day ahead of me and lots of time, I want to create more. I never work or make things in the evening without the light, which is why I always prefer the summer and the long days.

Katy Orme's home | Apartment Apothecary

Does your partner, Jules, likes to decorate the house too? Do you have a similar style or does it cause problems between you?

Jules hates decorating. He loves to build and create things, especially woodwork, but when I tell him we need to paint the flat or paint the floor or put up shelves he hates it and tries to avoid it at all costs until I nag him for long enough! His style is completely different to mine: if he had his way our home would be filled with enormous TV’s, computers, speakers and gadgets with wires all over the place. He is much more focused on function rather than beauty.

Katy Orme's home | Apartment Apothecary

Katy Orme's home | Apartment Apothecary

Katy Orme's home | Apartment Apothecary

Tell us five tips to decorate without much money:

1. Paint your floors instead of spending a fortune on new carpet or floorboards.
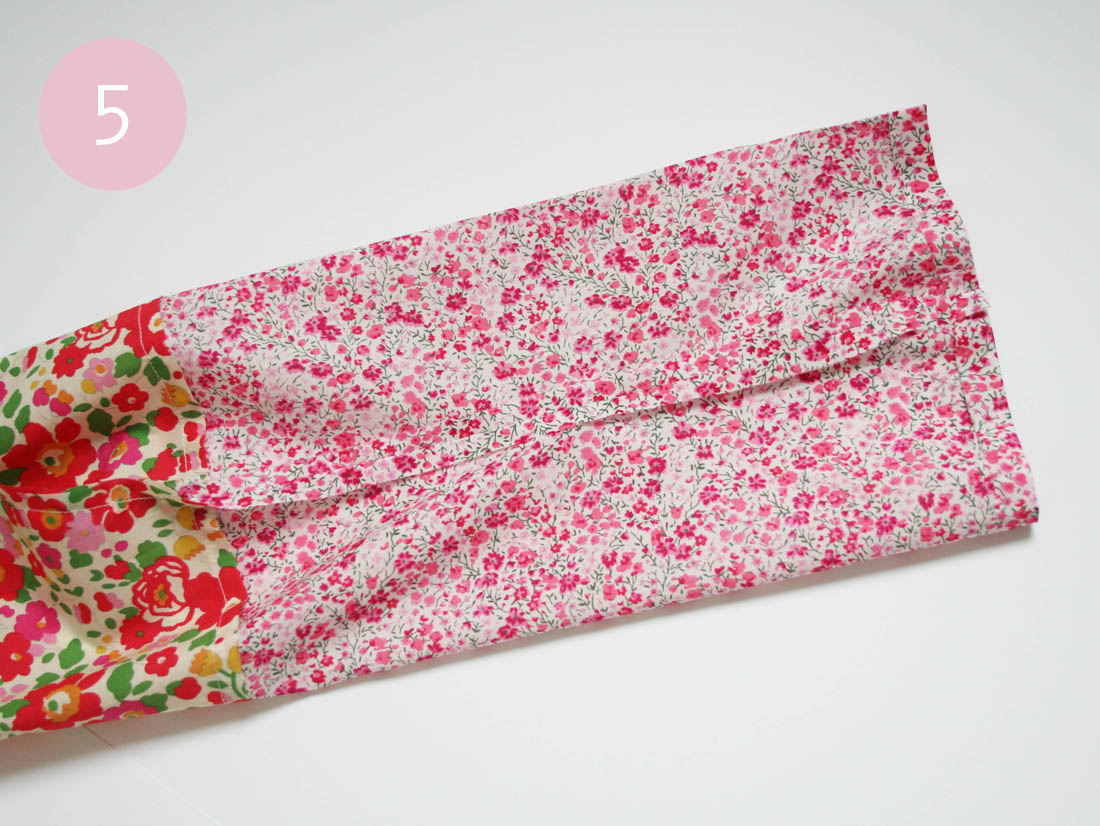
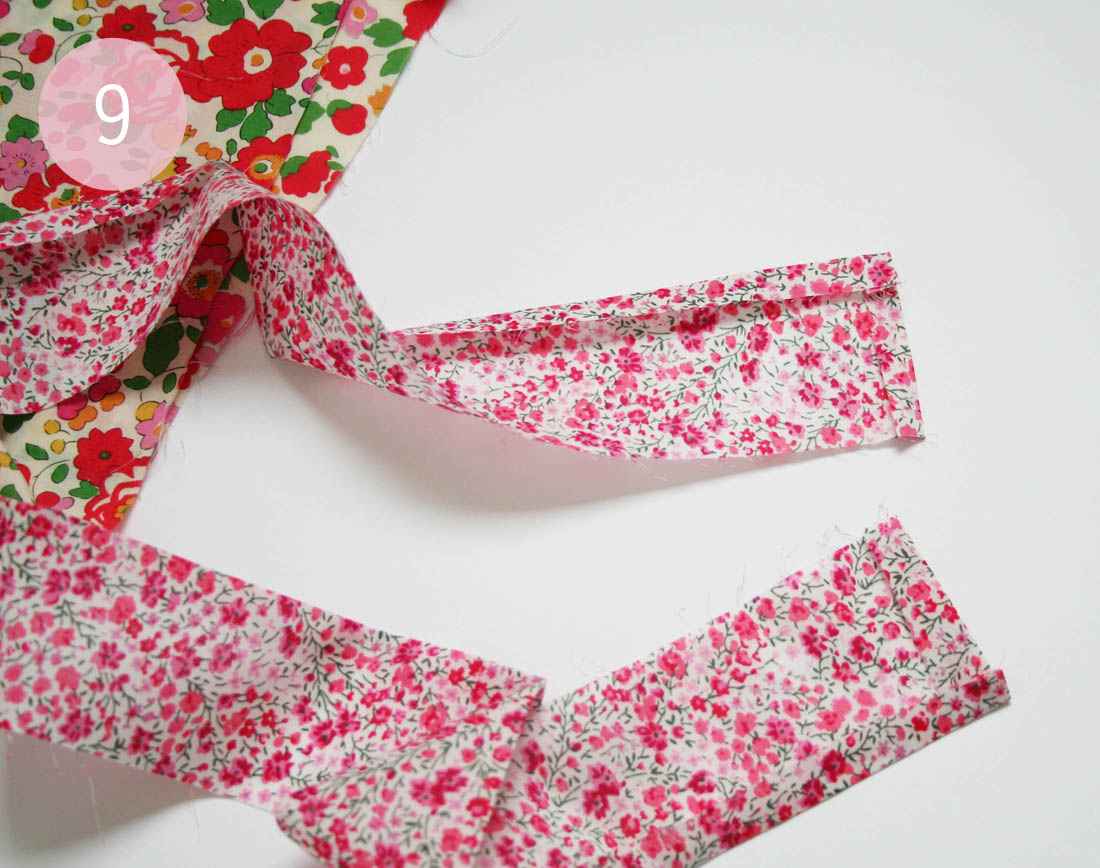
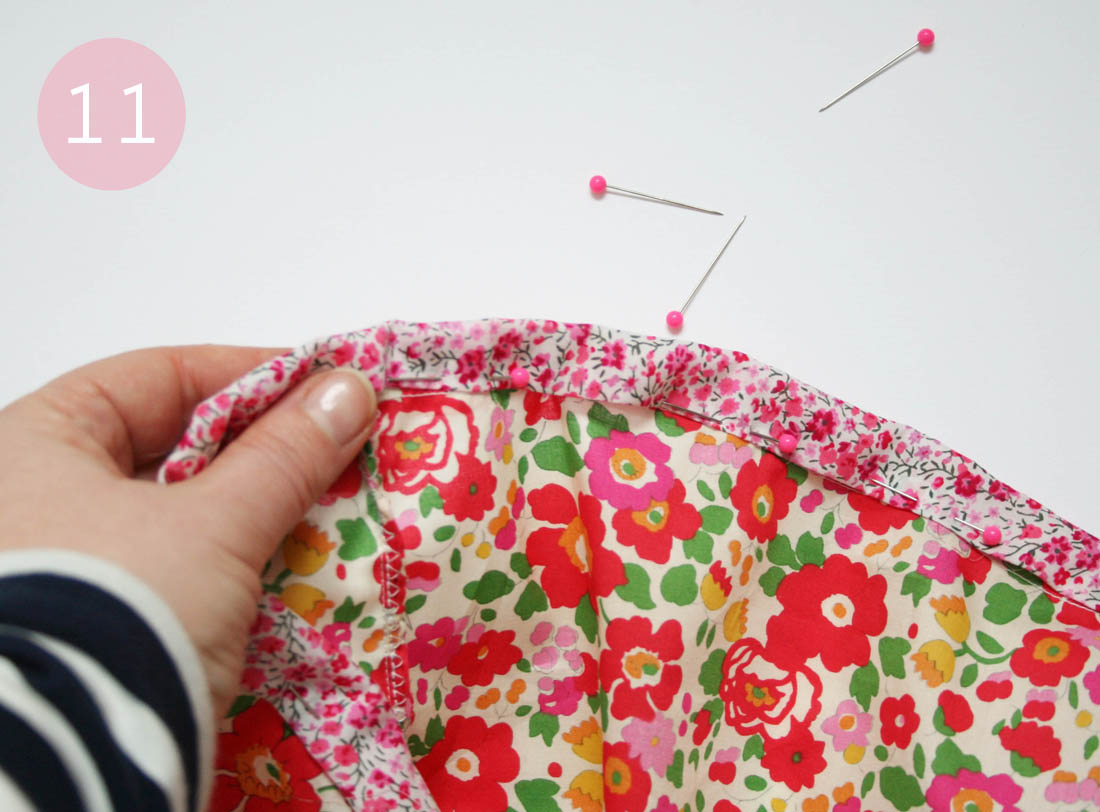
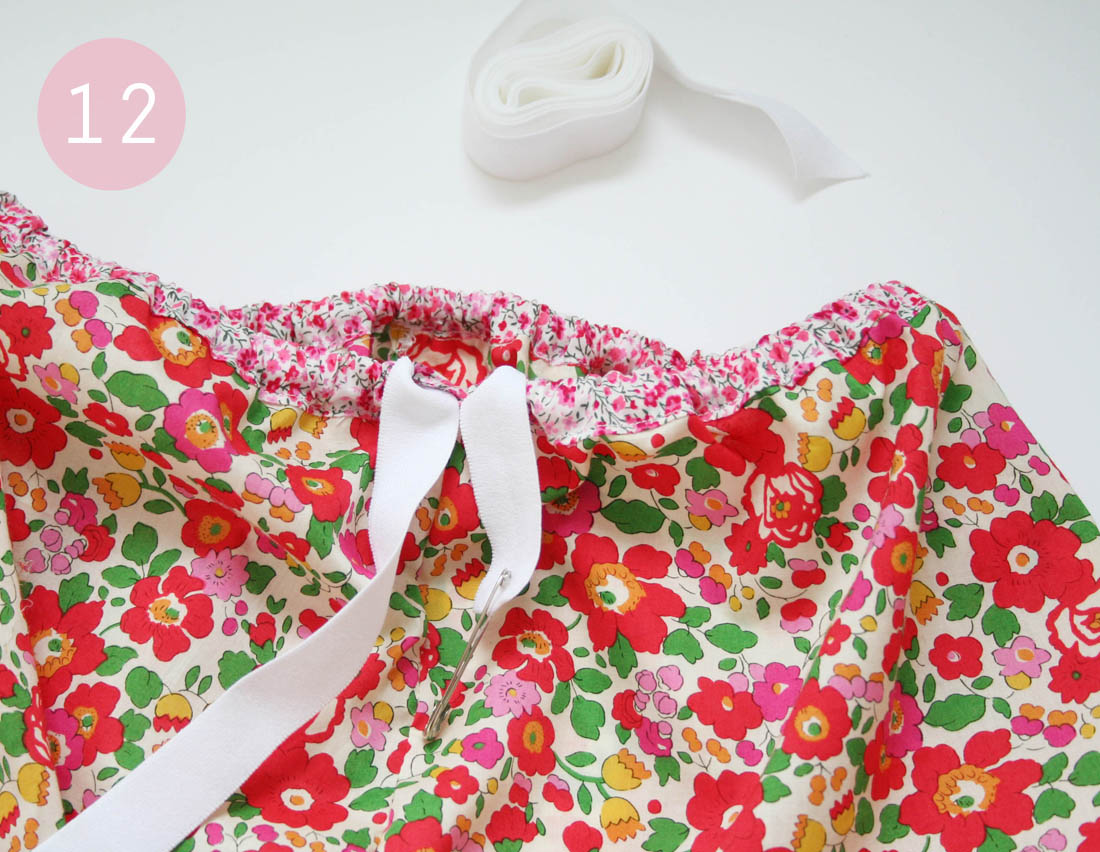
2. Learn to sew and make your own cushions, curtains and even bedlinen – it will save you an absolute fortune!
3. Bring old furniture back to life with paint, wallpaper or just new door knobs.
4. Go to your favourite furniture shop, get inspired and get an idea of what you like. Then go away and try and find a cheaper version on eBay, in a charity shop or at a flea market.
5. Don’t rush when you decorate and make the wrong decision at this will cost you twice as much to correct. Take your time, live in the space for a while to figure out exactly want you want and need.

Katy Orme's home | Apartment Apothecary

Katy Orme's home | Apartment Apothecary

What is your dream house?

We dream about building our own house one day near the sea. It would be very simple, wooden house with large windows as lots of light makes me happy. I would have a huge open-plan living room and kitchen and it would have to open out onto a garden, as I miss not having a proper garden living in London.

Until then, I want to buy a Victorian terraced house in London as I adore the period features such as the tiled hallway floors, fireplaces, ceiling roses, sash windows and original floorboards. I think all furniture looks so much more beautiful in a period home.

Katy Orme's home | Apartment Apothecary

Katy Orme's home | Apartment Apothecary

Katy Orme's home | Apartment Apothecary

What’s your favorite place in your house and why?

My favourite place in my flat is my home office. I have made it white, bright and light, filled with my craft supplies and a large work table. I love spending long afternoons in here sewing or crafting with the radio on in the background. It is such a relaxing, peaceful room.

Home office makeover by Apartment Apothecary

This week, I am very excited to announce that I have been nominated for an Interior Blog Award for the Best DIY Blog! However, I need your votes to be shortlisted so if you have two seconds to spare (it really does only take two seconds!) please do pop over and vote for me here. Thank you! x

blogbadge-voteforme!